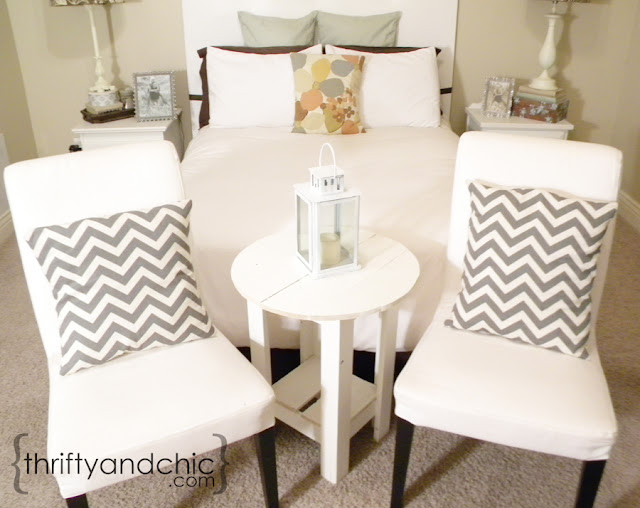
Here's what you need to make this table:
- Round wood top -no smaller than 17" diameter (unless you make the base narrower than my measurements) -or make your own round top using some scrap wood.
- Four 1x3s cut at 25"
- Four 1x2s cut at 25"
- Four 1x4s cut at 10"
- Four 1x3s cut at 10"
- Wood glue
- Drill and screws
Let's getting started!
Step 1: Create the legs. Place a 25" 1x3 perpendicular to a 1x2, making one of the longest edges flush together. Secure with wood glue, clamp in place. Do this with four times, creating 4 legs.
Step 2: Connecting the legs. Place two of the legs facing eachother down on an even surface. Take a 1x4 10" piece and secure it to each 'leg' on one of the ends -this will become your top.
Measure 7 inches up from the bottom and place the ten inch 1x3. Secure with wood glue. Once the wood glue is dried on both the top and bottom connector pieces, secure with a screw.
Do this to the other two legs.
Step 3: Creating the base. Now connect the two sets of legs by connecting a 1x4 to the top and a 1x3 to the bottom one each side just as you did with ones in step 2, just now you will be creating a square. See the picture below. (now if you really wanted this base to be square, you would have cut each of the 1x4 and 1x3 pieces you are using in the step to 9.5" instead of 10", but I didn't care ;) )
Step 4: The table top -depending on if you bought a precut piece or not. If you bought a precut piece, go to step 5. If you didn't. Here's how to make the top...this definitely made it more cottage looking doing it this way. I took 4 pieces of scrap cedar planks that I had lying around from my wall project. Laid them down, and used the table top I already had as an outline. If you don't have a round piece that you can use, click here and follow the instructions on how make a perfect circle (I did it with a serving tray, but its the same concept). Once you have the circle traced, cut it out using a jigsaw. My circle ended up being 24 inches in diameter.
Step 4: Securing the table top. Find the center of the circle on the bottom side, and create two perpendicular lines. Find the center of each one of the legs and mark. Now line up all marks with the lines. Make sense? If you don't want to do this, you can just eye it and measure each side to make sure its equal. Now secure the base to the top with wood glue. If you are using scrap wood for the top, you can do it the above mentioned way if you secured the pieces together into a circle, or just place each piece on the base individually and secure to the base. I suggest securing the individual pieces together first and then securing to the base.
Step 5: Finishing -Paint or stain. I painted mine my go to color, Crisp Linen White from Glidden.
To add to the cottagey feel, I also cut 2 cedar planks at 10 inches each and secured to the bottom part of the base. It wasn't my original plan, but it sure matches the new top pretty good.
This is a super easy project and takes no time at all! Maybe 2 hours at most, probably not even that much. Most of that would be waiting for the wood glue to dry and the paint to dry :)
Here it is in front of my bed. I like it. Not sure if it's going to stay or not. What do you think?
Also, if you choose to make the top larger, you may want to adjust the measurements on the base to be wider so it doesn't topple over :) You can convert this to a square top also and you can change the height of this easily. It's a universal side table ;)
By far, this wasn't exactly what I had in mind when first creating this, I really wish I could have found a larger piece of round wood, I want a more cleaner and sleeker look :) But, I think the cottage look will do well in my house. We'll just have to see where this piece will end up living.


Thank you so much for sharing this tutorial on making such a cute side table! You did an awesome job! Have a great weekend!
ReplyDeleteLeslie
houseontheway@gmail.com
Im going to make alot of different tables using your instructions. Easiest ive seen and i dont need a stinkin kreg jeg!
ReplyDeleteThanks!