Today I'm going to share how I got all my bedding in my office for 12 bucks. There aren't a lot of 'how to' pictures so if you are a picture browser like I am sometimes, sorry, you'll actually have to read the 'how to' today instead for some of this to make sense :)
What you need:
Old Comforter
Two flat sheets in same size as comforter
Sewing Machine/Needle and thread (if you dare)
The size of my current comforter was a full. I like using full size sheets/comforters on twin beds, it just looks better, and fits a whole lot better (besides the fitted sheet obviously). Since the comforter was a full, I purchased two flat sheets in full. These sheets were a little under $6 each, on sale at Target. You can get sheets for this price anywhere really, like Home Goods, Ross, etc.
Lay the two sheets flat on the ground, right sides facing each other. Pin up and down the bottom, and the two sides. Send these pinned sides through the sewing machine. I gave about an inch allowance on the outside edge. Then, if you like, on the top opening, sew about a 6 inch line inside from each edge. So the comforter underneath has a place to 'hug'. This is good opportunity to sew on some buttons or ties if you wish. I didn't on mine, and its been completely fine.
To get that puckered look, lay the sheets down again, inside out. and mark where you want the 'puckers'. I used a tape measure to make sure they were even. On every other line, have the marks be the same. On the lines in between, do the same thing, just mark a spot in the middle of the other line's marks. Did this make any sense? haha. Just make it look somewhat symmetrical...or not. Its yours to do what you want.
Now at every mark, kind of roll it in between your fingers, having the mark be the tip, and send it back and forth through the sewing machine -sans fingers.
Turn inside out, put your comforter in, and there you have it! Although the dimensions of the comforter and the sheets weren't exactly the same, you couldn't tell once the comforter went in the duvet. Oh, and probably you should iron the sheets before you begin this whole process. You can tell I didn't on mine, and once the puckers are in, its going to be a little harder to iron.
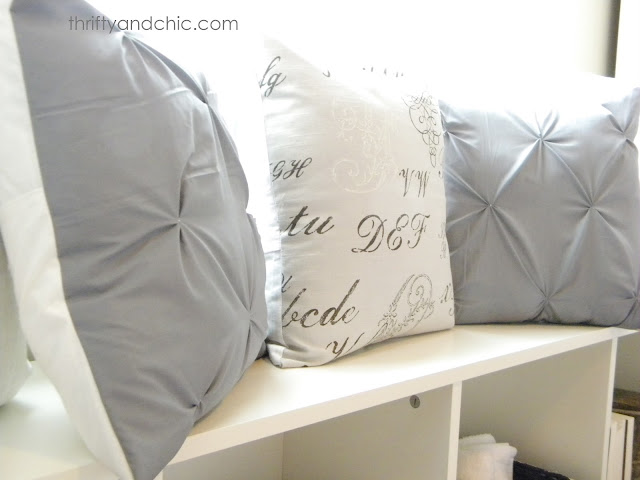
I used this same puckering technique on these pillows to bring a little unison in the room. I also have a tutorial here about a little different way to add puckers without a sewing machine.
The pillows on the bed were made from complete scrap fabric I had laying around. I'll have a tutorial on those coming soon. As for the bed skirt, I used the same Ikea mesh curtains that are hanging by the window seat. Just placed them underneath the top mattress and voila. Easy peasy. It adds just a smidgen of whimsy.
And there you have it, this whole bed was about covering up the old and making it look new. You should have seen those pillows before! haha. I'll have to take a picture for you of what all of this looks like without a little 'cover' therapy.


How beautiful! I love the blue pillow too, I might try making one like that! What a lovely headboard too! Looks like a very relaxing room!
ReplyDeleteI love the puckered duvet! It's so cute! I'm thinking of making a duvet myself soon!
ReplyDeleteYour room is just lovely, very well done. I like to find things at Ross also, always delighted with what one can find there. By the way, I believe I am a new follower (hard to keep up), really like your blog.
ReplyDeletethis is gorgeous I love how it's not tons and tons of folds I would love you to add this and any other posts you want to show off to my What We Wore and Made party over at http://raegunwear.blogspot.com/search/label/WWWMW
ReplyDeleteThat is so beautiful! I really need to give this a go...the whole room just looks lovely!
ReplyDeleteBeautiful job! Love it!
ReplyDeleteSo pretty! What a beautiful room :)
ReplyDeleteLovely i love the pillows to thanks for.tutorials xxx
ReplyDeleteYour pillows are completely to die for! I love them!
ReplyDeletePillow covers are make so beautiful and wonderful.This type of designs are really increase beauty on the pillow covers.
ReplyDeletecode promo
I've seen a few of these floating around, and yours is just fabulous!
ReplyDeleteConfession: I've had your blog open for the last two days because I keep finding more and more lovely rooms! Beautiful beautiful stuff!
Aloha,
Charlie
Omgosh! Tried doing this tonight... why do my pin tucks keep knotting up the bobbin and feed so badly?! Do you need a special presser foot or needle?
ReplyDeleteAhhh! Thank you for the puckered idea! I had thought about gathering the front, but didn't have enough fabric. This will be perfect! Yay!
ReplyDelete