I was provided product by DecoArt and compensated to write about this project, but all thoughts, opinions, and ideas are my own :)
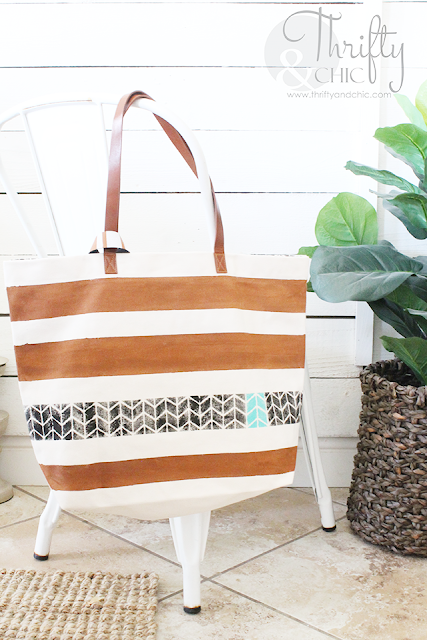
To complete this look, I used DecoArt's new Stylin' paint for fashion accessories.
Here are the colors and other supplies:
Plain canvas tote
Sponge paint brush
Stenciling brush
Painters tape
Step 2: I then color blocked the surrounding part of the pocket by painting the seams Black and the inside of the pocket Chestnut.
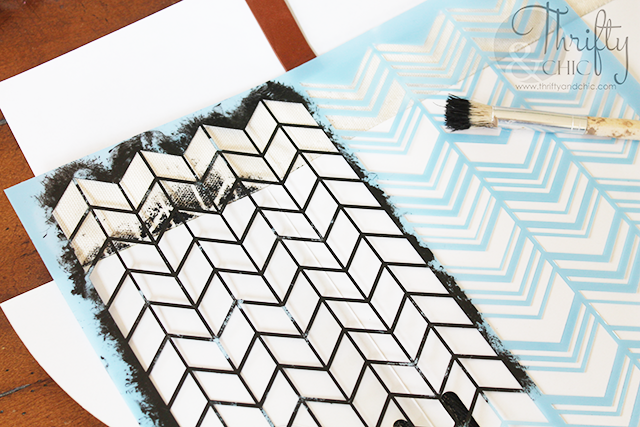
Step 3: I used the stencil to add more fun to the inside.
I lined the top of the stencil up to the folded over part of the seam. I did this to ensure it was straight without having to measure. Using the dry brush technique, I used my stencil brush and Black to cover the inside of the bag. The dry brush technique is simply blotting off the excess paint onto a paper towel before starting to stencil. I love the 'vintage' look it gives the herringbone.
I was going to keep the top two inches or so plain, but then decided to put the stencil all the way up to the top. So, I protected the bottom part that was already stenciled (just in case of residual paint from the stencil) and under the top part with some paper.
This is the complete look of the inside when it was all done.
And the other side without a pocket.
Step 4: Now for the outside! I placed a piece of 1" tape along the very top of the bag. I then measured 3.5" down from the top of the tape and placed another piece of tape. So, between each top piece of tape measures 3.5", to clarify. I did this until I ran out of room. I did use 1/2" painters tape along the bottom, so the bottom stripe is a little smaller than the others. I did this on purpose to add a little interest.
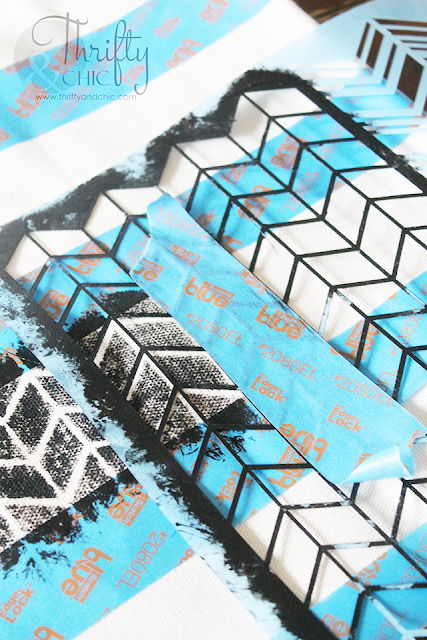
Step 5: On the stripe that was one up from the last stripe on the bottom, I stenciled the herringbone pattern with Black. I decided that I wanted a little Aqua strip on one of the rows, so I placed a piece of painters tape over the part I was going to paint with Aqua. I then finished the stencil up with the Black using my stencil brush.
Here's what it looked like without the Aqua.
I then placed the stencil back on when the Black was dried, taped off the neighboring black parts, and painted the middle Aqua.
Step 6: Next, I painted the other stripes with Chestnut using my sponge brush.
Step 7: I removed all the tape and was left with this!
I just love how this turned out! I did add the White in the supplies above in case you need to touch up. I probably should have along one of these stripes, but it didn't bug me enough....yet :)
This tote is going to make the rounds between play dates, splash pads, swimming pools and picnics this year! Can't wait to start using it!
www.decoart.com
Disclosure of Material Connection: This is a “sponsored post.” The company who sponsored it compensated me via a cash payment, gift, or something else of value to write it. Regardless, I only recommend products or services I use personally and believe will be good for my readers. I am disclosing this in accordance with the Federal Trade Commission’s 16 CFR, Part 255: “Guides Concerning the Use of Endorsements and Testimonials in Advertising.”


0 comments