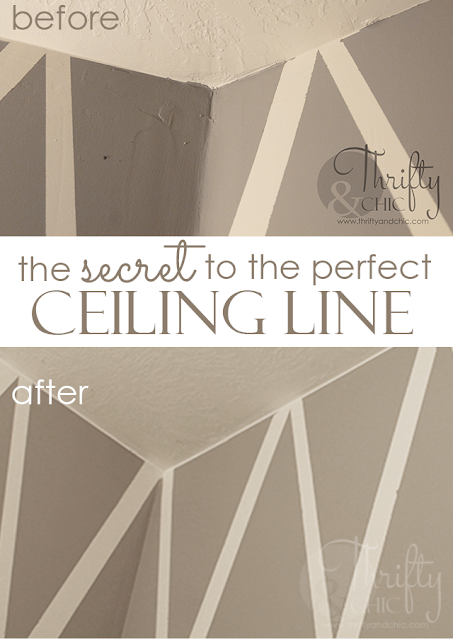
We recently stayed at my mother-in-laws vacation home and I noticed something on their walls...probably something most people wouldn't notice :) But the line between the ceiling and the wall was immaculate! It looked amazing and so crisp. Wish I had taken a picture to show you all, but you'll just have to believe me. The more I analyzed the wall, I realized that it was caulked. Which of course, gave me the idea to do the same thing to my walls.
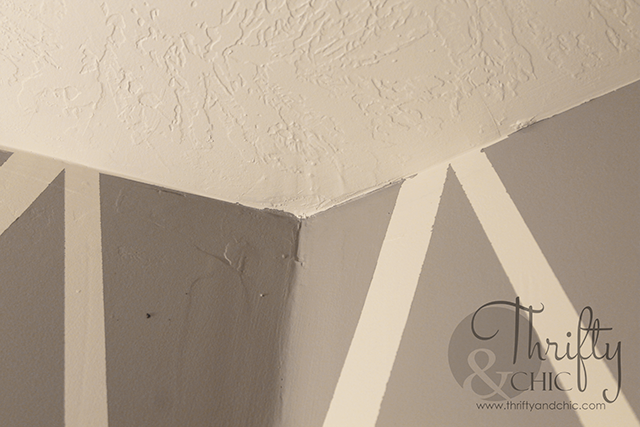
Every time after I paint the ceiling or a wall in our house, I'm left with not so awesome looking lines where the wall meets the ceiling. No matter how hard I try, the paint just doesn't look right in areas. I think the cause is the textured ceiling, it just makes grooves and bumps that tape doesn't adhere to all the way or the ceiling line isn't perfectly straight. Here's the before of our bathroom. See the uneven lines?
Doesn't look too bad? What about now? That's one of the corners. It pained me to go in there and look at the ceiling; it drove me nuts!
So, I decided to try the caulking idea in here first. So, I used some painters tape and caulk meant for molding.
I then followed the ceiling line and placed some tape on the ceiling, about a centimeter or so off the wall. And then I taped the wall about two or so centimeters away from the ceiling.
I then placed a bead of caulk along the tape and smoothed it in with my fingers.
Now the trick to this is to not make the caulk dry. Trust me, it will turn into a big ugly, horrible mess. Right when you place the caulk on one wall, tear off the tape. Then do the next wall, etc. DO NOT let it dry... mmm-k? :)
The result?
Amazing! The line is so crisp and clean. Of course, you can probably do this same thing with white paint itself, carrying it down the wall a few centimeters, but I think the caulk fills in the little gaps where paint won't get. Plus it makes the intersection of the wall and the ceiling a ton more smooth, filling that in also.
Once again, the before:
And after:
I'll be doing this in all my rooms now! The result is just amazing, and it's so quick and easy to do!
Subscribe to:
Post Comments (Atom)


I never even thought about this! I always drive myself nuts trying get a nice clean line!
ReplyDeleteOh and when I did the caulk between the backsplash and the countertop in the kitchen I learned the hard way that you aren't supposed to let the caulk dry before you take off the tape so thanks for giving people a heads up on that haha ;)
How clever is that. Never would I think of doing this, but it is amazing. Great job.
ReplyDeleteI am new to blogging, and I just wanted to share that I love your blog. This looks stunning, and I never would have thought of this. I will be using this method to clean up my master bedroom. Thanks for the tips!
ReplyDeleteWhat a fantastic idea. It makes such a difference. Thanks for sharing this great tip.
ReplyDeleteFantastic... :):):) great idea!
ReplyDeleteBrilliant. I used this method before to get perfect lines between red paint butting up against gray paint but i only used caulk to prevent bleeding. once paint dried enough, i removed paint AND caulk. But I le this idea of leaving layer of caulk between wall and ceiling.
ReplyDeleteAddendum - This idea is especially useful for those of us who have plaster walls where a clear line between ceiling and walls just doesn't exist!
ReplyDeletenot crazy about the white line that ends up on the wall - reminds me of the end result when you use one of those paint pad things with the wheels
ReplyDeleteI don't use white, white on my ceiling so do you use a caulk that is off white? Seems like the difference would draw the eye right to that seam.
ReplyDeleteWall moulding pushed right up to the ceiling.
ReplyDeleteLove this. Love your bathroom what color is that and how did you do the lines? Do you have a post on them?
ReplyDeleteIt is quite new to me. Looking at the walls, I fell really interested in it. Thanks.
ReplyDeleteI needed this so bad - Thanks!
ReplyDeleteLooks wonderful. But wondering what it would be like to paint over that when you want to change the colour?
ReplyDeleteI have never been able to find a caulk that doesn’t yellow over time if left unpainted. Did you paint over the caulk after it dried?
ReplyDelete