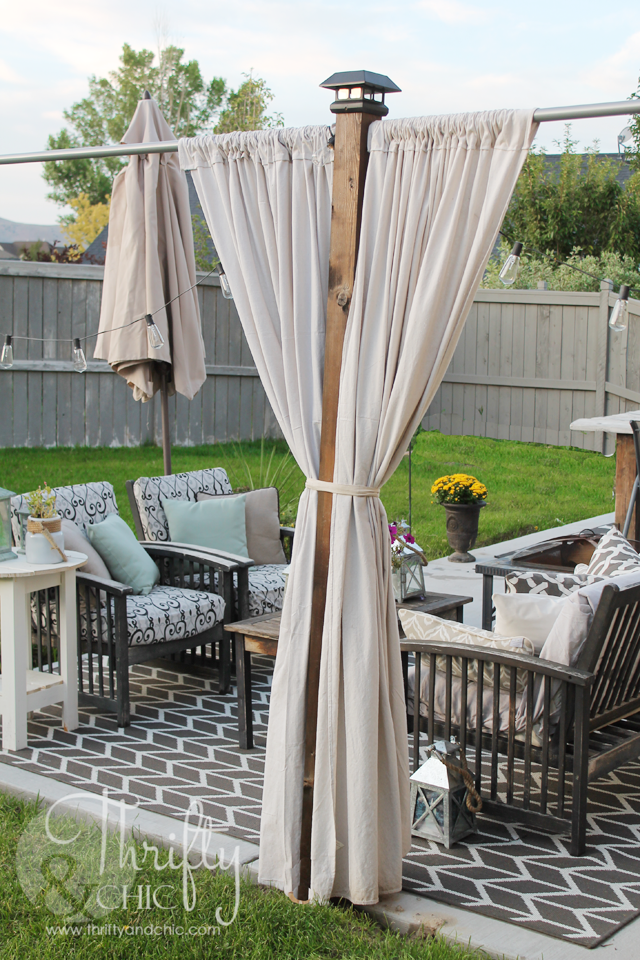
Our neighborhood is situated on a hill, so we get the pleasantness of having a huge house peering into our backyard. Even if a fence were up, the house is high enough that our neighbors would see right into our backyard. So, after years off feeling a lack of privacy when hanging out on our porch, I finally came up with an idea! A cute little privacy screen that resembles the look of a pergola.
We don't have it in our budget to build an actual pergola...at least the kind we want...so this works perfect in the interim until we get one built.
It's really simple and can be done in a day! The supplies I used were:
3 4x4 posts (8')
Stain
Drop clothes
2 curtain rods
Post caps
The first step was to figure out the depth I wanted to put the posts. I wanted the hole to be pretty deep, but I didn't want it to take away from the height. As luck would have it, I could only dig 13" below the surface of our patio since I hit bedrock. So, to keep the posts all the same height, I marked 13" on each post. This would be where the patio was going to hit it. So, if I dug to deep or to shallow I would know. And just a heads up, make sure you call your power company/gas company before you dig so you don't hit any lines. :)
Next was setting the post. Since this was temporary, I didn't cement it in. I would recommend cementing it if you are planning on doing this long term. We do have some crazy crazy wind, and so far the posts have hung strong without the cement! I think it helps having the hole 13" deep in the ground. I did use a level to make sure it was level on all sides, using rocks and shims in the hole to straighten it out.
Once the posts were set in, I stained them using Dark Chestnut.
I went a few ways with hanging the curtains and the easiest and most secure way that I used was buying a couple of rods from the closet section in Home Depot. I used the hardware that they came with. It looks cheap, but I found that it was the most secure.
Especially since you can place a screw into the rod and into the hardware itself. This keeps the rod from falling off during gusts of wind.
For the curtains, I just used drop cloths I found at Home Depot also. I got a killer deal earlier the summer where I found a package of two 6x9's for about $10. The next best deal I found was one 9x12 for $20.
With the 9x12, I cut it in half so I had two 9x6 pieces. I also cut it to the height I needed (from the rod to the ground) leaving four extra inches for a fold over.
Since all the sides but my fresh cut side was already hemmed, I quickly hemmed the two fresh edges. I then folded over the fabric and sewed it in place. I believe this is called a pocket fold. This is where the rod is going to slip through.
For the bottom inside corners, I added a single grommet. This is used for when the curtains are closed. When it's windy, the curtains will soar, so this keeps them from doing that. I just stole one of the pins we use in our veggie garden to keep the hoses down to secure the grommets.
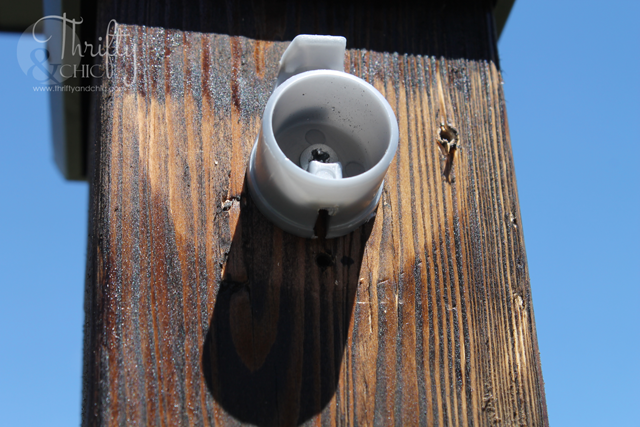
For the posts, I also bought some LED post caps. They also have normal ones that you can stain to match the wood. I'm going back and forth of which look I like the most. So far, the LEDs have stayed up :)
To secure the curtains to the posts, I just used some ribbon. I also decided to decorate this one by adding some mirrors. Why not? :)
I love the look from this angle. These are also a great way to hang patio lights! I've had these up for about a month now and love them! We have had multiple wind storms since and haven't had a problem. They are holding strong! The curtains do get a little stiff especially with rain and sprinklers. Oh, and they do say not to put them by flames, so drop clothes aren't recommended to use if you have your fire pit close by since they are flammable. Just an FYI ;)
Here's a quick shot of how they look closed. I think maybe next year I'll paint them a little to add more interest, especially for when they are closed. But for this year, I couldn't love them more!
Here's the cost breakdown:
Posts: 3 at $8=$24
Curtains: $30
Rods: 2 at $14 =$28
Caps: 3 at $6=$12
Stain and grommets I had on hand.
Total out of my pocket: $94
Pin for later:


This looks so cute! I love how cheap yet surprisingly pretty drop clothes are :)
ReplyDeleteGreat Idea... We too have this same problem...I have a drop cloth just sitting here...time to get busy! Thanks for sharing!
ReplyDeleteLooks great! Check your math on the caps ;)
ReplyDeleteGood and cute. We have to pay a $500 fee to build a deck or anything like that so this would work out nicely as it is not permanent.
ReplyDeleteI am wondering if it would work if you use planters with cement for the posts?
ReplyDeleteThis is exactly what I was thinking. We have the same privacy issue. I'm thinking of using heavy duty shower curtains instead of drop cloths, since they are made to get wet. Great job! Love the decor too!
ReplyDeleteI have a quick questions with regards to this project. Could you use 4x4 deck blocks instead of digging the posts in?? Just curious as to how they would hold up in the wind...this is a beautiful project by the way.
ReplyDeleteI did this and love mine. My problem, my curtains ' drop cloths' have began mildewing with 2 days of rain. Have you ever experienced this?
ReplyDeleteI wonder if a water proofing spray on the drop clothes would stop them from mildewing?
ReplyDeleteYou can wash drop cloths with clorox.
ReplyDeleteYou talked several times about heavy wins. I have the same problem. What do you do about all the things in your space.... furniture and decorations.... do you take them in and out all the route? I'm looking for a wind solution. Lol
ReplyDeleteI kind of just let it all flop around in the wind :) I lose a pillow every once in awhile, but the fence usually catches it on the other side. I just learned that I don't keep things out there that I don't want broken :)
ReplyDeletewon't the drop cloths mold after rains? I wonder if vinyl curtains would work better...or sheers...have you had any issues?
ReplyDeleteLove it. I have actually thought about doing something really similar. Using gazebo replacement enclosures/sidewalls. I tad bit more expensive but no mildew, stiff or flammable concerns with it.
ReplyDeleteHi three year old post! I am in the process of doing this now, thanks for the idea! So far I have dug my holes. I was able to did 19" deep before hitting bedrock. Just curious if you live in an area where you have to worry about frost heave. And if so how did your posts hold up?
ReplyDeleteDon’t the pipes rust???
ReplyDeleteSimply amazing, what area of country do you live I just wonder if it would hold up in the midwest
ReplyDelete