Wow, this whole Monday off thing has totally thrown off my groove :) I'm not complaining though....at all. I was actually thinking the other day, wouldn't it be awesome if you were off just as much as you worked? Like every other month, you just work two days and got five days off. How awesome would that be? I mean, I guess I can just not work at all, but that's what keeps me sane, and what keeps my insane ideas a reality :)
Here's a not so insane idea, but its an idea. A super easy one at that, something that anyone can do to update a desk or a table.
So, I really wanted to paint this whole thing but the hubs keeps giving me crap about turning everything white. Plus I think that I needed a little something in my office/guest room to keep it 'grounded' and not have it float off into space. haha :) Although, you may see it painted in the next few months......cuz thats how I roll :)
Anyway. Here's the before of the desk sans crap all over it. Yes, this is sadly sans the crap. You can still see crap...and dust... I know. But you didn't see it before this picture, or maybe you did in another post, then if you did, you know this is sans crap.
As you can see from the dust, I obviously did not use this desk...like ever. It was too small for anything really and just didn't jive with my creative spirit. :) Does dark and dusty and small jive with any one's creative spirit?
Anyway. For a cheep and super quick upgrade to a little more stylish and slightly bigger table, I turned to some 2x4s.
I cut the 2x4s a good six or so inches longer than the current desk top, and added an extra one on there to add a little more depth. I secured them in place with a 1x2 and some nails.
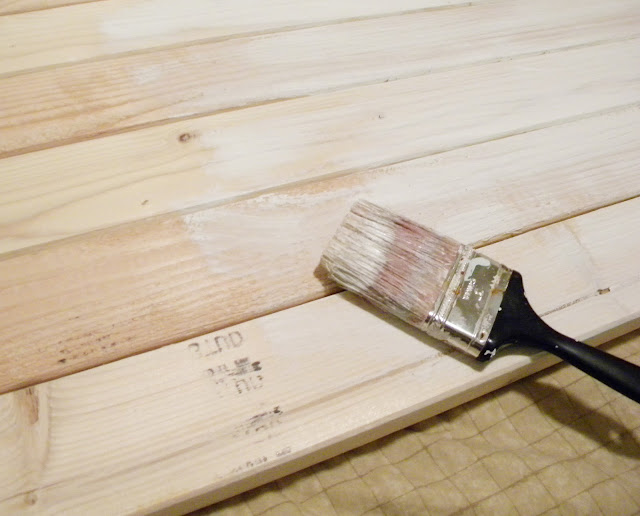
Then gave it a good once over...or three times over with white paint.
And placed it on the top! So so easy. Since the wood is so heavy and one side is against the wall, it doesn't move around at all, so there was no need to secure it to the desk underneath.
And since I didn't paint the rest of it, I decided to clean up the shelves and add pops of white on them to tie the look together.
See, didn't I say quick and easy? This was like a 10 minute project (not including the paint drying time, cuz that doesn't count) that cost about $4.
Since I know some might ask, the gaps in between the wood don't bother me a bit since I don't really hand write anything anymore; this is the perfect home for my laptop :) And if I suddenly start to feel the desire to actually hand write something...either I'll just go downstairs and do it on our kitchen table...or I guess get a clipboard :)
Subscribe to:
Post Comments (Atom)


Awesome. What a terrific idea.
ReplyDeleteOh I love this!!! So crazy how a new top just transformed that desk! And I love the black and white. So glad I'm not the only one who's husband rags on for painting everything white. Every time I say I'm going to paint something, he goes "Lemme guess...."
ReplyDeleteWhat a great desk makeover - awesome transformation! Amazing what you did with some 2x4s! I love the white top and dark base. I saw your share at Tip Me Tuesday Link Party - glad I clicked! I'm a new follower! Cheers ~ Mary, (SweetLittleBluebird.com)
ReplyDeleteI am so going to have to do it to my desk! Thanks for the inspiration!
ReplyDeleteThis is just stunning and so creative! You could always add a glass top, but it look gorgeous as it is. I pinned it of course :)
ReplyDeleteLove this! But I'm such a newbie, I don't know how to nail the boards together...to each other? Nails on an angle?
ReplyDeleteAnd wondering what type of paint works well for a desktop? Have always been afraid to paint furniture because I thought the finish would scrape/scratch and not hold up.
Very, very clever! It's pretty and functional. And not entirely white (a nod to the hubs).
ReplyDeleteTerrific idea. And I love the black and white. I get what you mean about the small size - my craft table is way too small for anything much. Maybe this is the solution.
ReplyDeleteBTW- found you through The Inspired Room tag on Facebook. Woohoo!
this is awesome!
ReplyDeleteGREAT makeover! :)
ReplyDeleteI like the black and totally think it grounds the desk! Love the top you added to it!
ReplyDeleteThis is a fantastic idea. It looks gorgeous. Love this idea.
ReplyDeleteRuth
So very cleaver you cleaver girl! I love quick, easy, and cheap ... except in my men {wink}!
ReplyDeleteSmiles,
Lesli @ BeautifullyCoastal.com
I just came across this in looking for a way to update our black desk. Thanks for the inspiration! When I get around to doing mine, I will definitely link back to you for all the credit!
ReplyDeleteChaili
Good idea!
ReplyDeleteLesley byporchlight.blogspot.com
Very clever. Its turned out beautiful.
ReplyDeleteGreat finished product. I could do with doing this to my work desk but first I need to de-clutter, that will take at least a week with the state it's in now.
ReplyDeleteit look unusual, i like it so much and i love your exclusive ideas, thank you ..
ReplyDeleteyou have a lot of interesting ideas and i love your pretty tastes always, thanks
ReplyDelete