My poor husband must think I'm crazy. I love change. Maybe I'm addicted to it? We've lived in our house for about a year and half now. And our bedroom has changed probably....at least four or five times, and that depends on the degree of change. If you count everything...its probably more like twenty.
Well. A week or so ago. I got one of those visions in my head. Don't you just love them? And I couldn't get it out. I knew I wanted to change up the master bedroom a little. I already painted all my furniture. But my vision was telling me that this change had to be more dramatic.
And so....it starts.
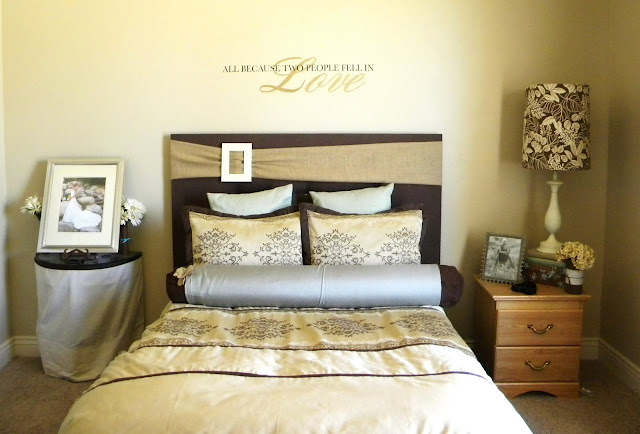
Here's where its at so far. Yep. That would be my 3rd....yes, t.h.i.r.d....headboard in a matter of a year in a half.
But isn't she a beaut???
I followed the same steps when making this headboard as the now 'retired' one I did in this post.
It only took me an hour to upholster once I got the base how I wanted it. don't you just love DIY headboards.....or DIY anything :)
Here's the original headboard....and thus, essentially, the before - before picture of my bedroom:
It only took me an hour to upholster once I got the base how I wanted it. don't you just love DIY headboards.....or DIY anything :)
Here's the original headboard....and thus, essentially, the before - before picture of my bedroom:
And making progress with the nightstands:
And after! Voila:
All in all....I think it is a good change.
And of course....I had to make it dramatic. Its 80 inches tall, thats six and half feet!
And faux white leather.
I got the fabric half off, so all together, this baby only cost me $30 to make!
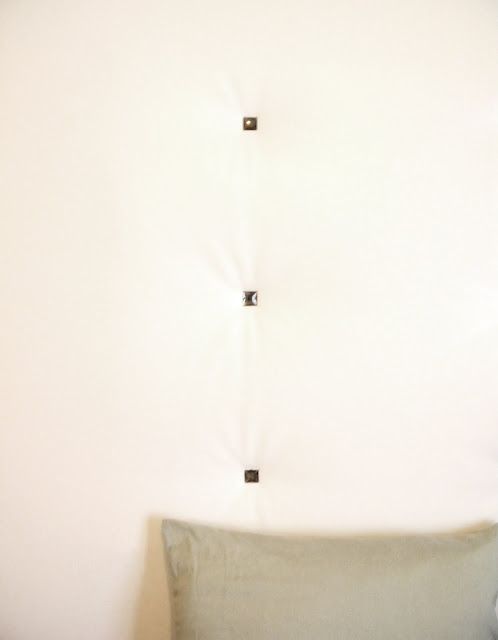
I tufted it simply by aligning 9 points and stapling them with a staple gun.
Then got my hot glue and glued on some bling!
Now for more drama!!! My beautiful tan walls are now going to be colored mocha!
My curtains are coming down, and new ones are going up... and I'll actually have art on the walls! I'm so darn excited!!! ......sorry babe :)


So beautiful I wish I would just make one already!
ReplyDeleteI LOVE it! Beautiful, wanna come make one for me?! Great job :)
ReplyDeleteIt looks great!
ReplyDeleteit is amazing! just like your blog-that is why i gave it a very important award over at mine!
ReplyDeleteWOW! I can't even imagine changing so often. I must admit, I LOVED the headboard with the "ribbon" on it. But, this looks really cool. Now, you wanna make one for me? Oh wait, I have nowhere to put it...scratch that. haha
ReplyDeleteSo pretty! I can't believe it didn't cost more.
ReplyDeleteI wanted to let you know about Atticmag's new linky party - Giveaway Friday! It's a convenient place for bloggers to link their giveaways each week. We've kicked it off with a fantastic giveaway of our own. Five lucky winners will win material to do a backsplash in their homes. Hope to see you there!
Allison
Atticmag
I thought I'd let you know that I love your blog! You are so crafty and creative, you also make me want to do more with my house. However my projects don't turn out like yours so if you're ever in Idaho I would love for you to come decorate my house! Thanks for sharing all your projects with us!
ReplyDeleteI love the height of the headboard so much. I think it's definitely a step up from the last one (which was pretty awesome as well!). Woohoo!
ReplyDeleteSo is this one just taller? I say 'just' although we know this is amazingly beautiful! I want to make this one. Did you do the bottom any different than the 'retired' tutorial headboard?
ReplyDeleteWhere do you get all that stuff for cheap? $30 for all that faux leather? I can't find a scrap of anything for under $100
ReplyDeleteI just wanted to let you know that I featured this project over on my blog! I love this and wanted to share it with everyone!
ReplyDeleteMarie H.
http://www.progressionbydesign.com/fabric-headboards-diy-vs-professional/
Would you please add some details about how you finished the bottom of the headboard? It looks very different from your first one and it would be nice to avoid the "trial and error".
ReplyDeleteThanks,
C
The plywood on this headboard actually just goes all the way down to the bottom instead of using the the 2x4s. And since the plywood looks ugly by itself, I just used some of the fabric and covered it. Hope that helps!
DeleteI added covered shank back buttons to mine. When I stapled the tufts I stapled over a 6" length of heavy duty cord and then just pulled the cord through the button shank, knotted it tightly and cut the excess. I was afraid hot gluing buttons wouldn't be durable.
ReplyDeleteThank you for the super easy tutorial! I made my headboard this weekend and it was real easy to follow! I can't believe what a nice addition this is to my boring studio apartment. Thank you for posting this!
ReplyDeleteHow did headboard stay in place....did you screw 2x4 to wall?
ReplyDelete