This post contains affiliate links
The past couple of years, I've been looking for some cute oversized sweater or cable knit stockings. I didn't have much luck unless I wanted to spend quite a bit of money. I then had an "Aha!" moment after Christmas last year, and realized how easy they would be to make my own...and a ton cheaper! I looked around my house and found the perfect blanket to use. Yep, a blanket! Although I couldn't bring myself to cut a blanket I loved, so I bought a new one at Target. (link here)
This blanket has the cutest cable knit design, is super soft, and can hopefully hold a lot of stuff. Another option for a blanket that is new this year, would be this one here! It's super cute too and would work really well with the sewing portion.Here are the supplies I used:
Old stocking for pattern
Pins
At least 2" ribbon
Sewing machine
Matching thread
Ribbon or rope for hanging piece.
Step 1:
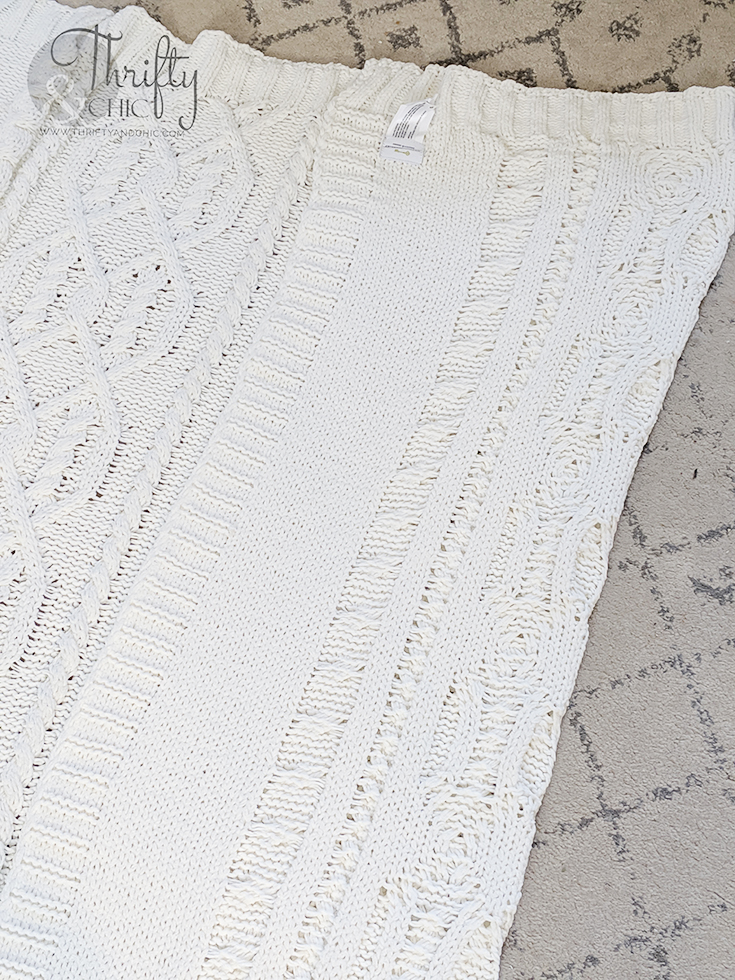
I put the blanket on the floor upside down. I played around with some ideas on where I wanted what design, how many I could put on the blanket, and where.
I ultimately came up with the idea of just folding one side over about into the middle. This gave me some cable knit design on one side, and a cuter pattern on the other. Folding it also meant less sewing, and probably more security in that spot.
Step 2:
Step 2:
I took a stocking...yes, funny enough another cable knit stocking. This is the one I used in years past and it has absolutely no give..also not big enough for the look I wanted to achieve..and too ridged. Anyway...I laid it out on folded blanket, and decided from there how much longer I wanted my new stocking to be, and how much wider. I came up with about 24" long. and a couple of inches wider that the current stocking I used for the pattern.
Step 3:
Step 3:
I traced out where I wanted to cut with a marker, and started cutting through both layers of the blanket leaving the folded side intact.
Step 4:
Step 4:
I then pinned the ribbon all along the cut edges, making sure to get both pieces of the blanket sandwiched between the ribbon. I used both a 2" wide ribbon and a 2.5" wide ribbon, the wider the better!
Step 5:
Step 5:
With the ribbon in place, I then sewed along the "seam". When sewing, be sure that all the blanket edges on both sides are in the ribbon. This type of fabric is easy to come apart after it's cut, so it's important to prevent holes by doing this.
Here's the finished look of the ribbon. I did realize with a couple of my stockings that when I turned it inside out that the toe was super pointy, so then I just took off about 3 inches of the toe by sewing a line from the start of the curve to the bottom line. It looked like it would be stumpy, but turned out good.
Step 6:
Using the rope or ribbon, it's now time to sew on the hanger. I used a macrame rope, folded it three times, and then sewed it along a small piece of ribbon on the top edge of the folded section. So, not where I just sewed the seam, but on the side where it's just folded together. To make sure it's super secure, I went over this about 10 times.
And there it is! Well, here's one :) It's the perfect handmade look I was going for. Not ridged, a little clumsy, and big.
And since they are home made, they are of course not all the same! I made one or two a lot longer than the others. Not on purpose, but I love how they look when put together because of that mistake.
I know Christmas is super soon, and you may have your stockings already up. But now is the time to get looking for cable knit blankets on sale so you can do this next year!
And there it is! Well, here's one :) It's the perfect handmade look I was going for. Not ridged, a little clumsy, and big.
And since they are home made, they are of course not all the same! I made one or two a lot longer than the others. Not on purpose, but I love how they look when put together because of that mistake.
Now, I have not had a chance to actually put anything in here....so I'll let you know how they hold up. But, for now, I'm just enjoying them the way they are! The best thing though, if I get a hole or something, it's super easy to just sew right back up! And also...I got 4 large stockings out of one $25 blanket. When I priced these types of stockings, $25 was a steal for just one!
Disclosure of Material Connection: Some of the links in the post above are “affiliate links.” This means if you click on the link and purchase the item, I will receive an affiliate commission. Regardless, I only recommend products or services I use personally and believe will add value to my readers. I am disclosing this in accordance with the Federal Trade Commission’s 16 CFR, Part 255: “Guides Concerning the Use of Endorsements and Testimonials in Advertising.”


0 comments