This post is a collaboration with 3M DIY. To keep up-to-date on projects, products and sampling visit 3MDIY.com
I had the great opportunity to once again work with 3MDIY.com this year with some projects....so, out came my thinking cap and trying to figure out what projects would be perfect :) I absolutely love my cedar planked walls in my dining room, and I've been wanting to do more planked walls throughout the house. If it were up to me, I would plank the whole house, but...well, two things are stopping me: the hubs and the 20-something foot ceilings. Talk about a pain in the butt that would be....and I'm talking mainly about the hubs, not the walls ;) I've been wanting to do something in the front room for awhile now, some sort of wall treatment. Our house is pretty much completely beige, but really only feels like that in the front room. As you know, I have changed that room more times than I can count and that you can imagine...and I've never been too happy. Happiness of a new arrangement or decor lasted about a week. I did have plans to do board and batten in here, but never got around to doing it. I think those plans have been in existence since 3 years ago lol. Yay for procrastination! Then I looked around my house and realized that another planked wall belonged in there. And somehow, I actually did it ...even without the hubs approval ;) He likes the cedar planked wall but didn't like the idea of this new planked wall. Figures. He says that there are thousands of houses out there that probably have some faux wood walls from the 70s that they would be happy to get rid of :) In a way, I guess it's kind of true. Weird how styles change and evolve...and here we are with the same idea, just in white. ...gives me new inspiration to paint my mom's basement though :)
This was also a lot cheaper than the cedar planked wall since it's using faux wood. The cost, if all you need to do is buy the masonite (tempered hardwood) and corner molding is about $27 for a this wall which is about 9 feet high and 11 feet wide.
Here are the supplies I used:
6" wide pieces of masonite, enough to cover your wall
Corner molding
3 quarters (or something to measure the gaps)
3M SandBlaster Sandpaper from 3M Advanced Abrasives
3M Patch Plus Primer
Jigsaw (in case you need to cut around outlets)
Nail gun (or if you dare, nails and hammer)
ScotchBlue Painter's Tape
ScotchBlue Drop Cloth
Paint
White caulk
The stuff that I used for the planks is masonite at 1/8th inch thick. It looks like what is used for pegboard, but without the holes. It's rough on one side and smooth on the other. It's the cheapest thing to use for this project (unless you get it for free somewhere). You can find this in the plywood department. Its about $8 for each 4'x8' piece. You can have the people at the home center cut them for you (which I recommend to save your sanity) or cut it yourself. Whoever cuts it, make sure that they cut it straight. It's a really wobbly material, so extra time is needed to make the cuts exactly 6" beginning to end. If this doesn't happen, then your boards will all by screwy and your wall will look lopsided and skiwampus.
Once you have all your cuts and material, lets begin:
Check to see if your ceiling is level. If it is, great! Get started and start putting up your first piece. If it isn't, make sure the first piece you are putting up is level. You may have a gap between it and the ceiling, but we'll fix that later.
Use your nail gun to secure the pieces on the wall, being sure to place the nail in a stud. You'll want to do it in each and every stud. When placing the pieces on the wall, try to stagger them for the best look. I tried a few different ways, and this way came out to look the best :) Trust me, I do the missteps, so you don't have too :) For my wall, as you can see below, I had to cut some of the pieces down to fit. So, I used a 8 foot piece and then butted up a 3 foot piece. Now, don't go and cut all your shorter pieces at the same time, most walls aren't the same size up and down. My varied by an inch or so, so make sure you measure and cut for each piece. I know it will save time the other way, but this is the best way to get the best look :)
Between each row, use something to make the gaps even. I used 3 quarters. I wanted my gaps to be a little bigger than most planked walls I've seen. You can use a comb or a shim, whatever works best for the look you are going for :) With the quarters, I placed them in between the top row and the row I was about to secure. Secured the board once, and then took my level from there and made sure it was level. I only used the quarter once per piece (see the video at the end to get more of an idea of how I did it).
Once you get to the bottom of the wall, or wherever your outlets may be. Mark where the outlet starts and ends on the plank that will be on it, and then measure how high. Draw it out on your masonite, cut it with a jigsaw...
..and then use some sandpaper, I used 3M SandBlaster Sandpaper in 120 grit., it's perfect to flatten the grain.
Now place it back on the wall.
I explained in the video about the difference the saw blade will make. Your last strip won't be 6 inches. It will be much smaller. I had to use all my pieces, so I chose to put this piece on the bottom. I still have a small gap between the molding and the last strip, but once it's all painted, you can't even tell.
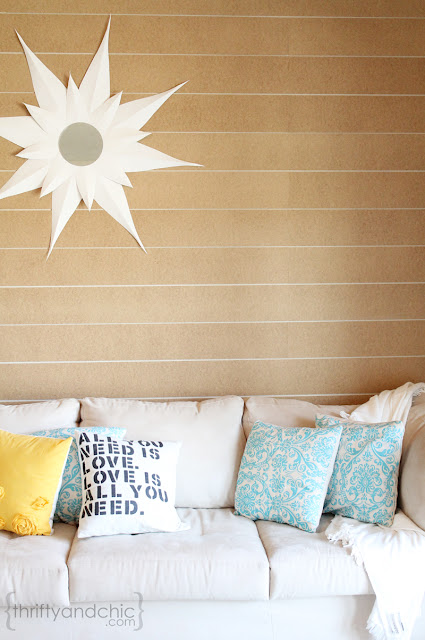
Now your wall is up! I seriously love this look. I was really really tempted to just leave it like this. Really tempted....
So, tempted I even put my furniture back and hung my mirror. I love this look. Love love love it. But....well, I have that little problem that lives in my house that stops things like this from happening. The husband. Ugh. He didn't mind it. But, I know he didn't like it. So onward I went!
Now for the seams. Take your 3M SandBlaster Sandpaper again and sand the seams to make the 'bump' less apparent.
Now, take the 3M Patch Plus Primer and fill in the seams and any nail holes you see (see the video below on how I did this in more detail). Once that is dried, sand again.
Then take your ScotchBlue™Painter's Tape and tape up everywhere you don't want to get paint :) Outlets, adjacent walls, ceiling, molding, etc. I also put down the ScotchBlue™Drop Cloth to protect the carpet.
Start painting! I used Glidden's Crisp Linen White for the color. Use a roller to put it on the slats. And then use a sponge brush or regular brush to get it in the gaps. You may have to do about 4 or so coats. At least I had to :)
But while you are painting, you'll start to notice those nail holes you missed. Use the 3M Patch Plus Primer on these like before. Wait to dry, and then sand. Paint over.
Now that you are done painting, and have taken off the painters tape, you'll notice some not so awesome things happening. The ceiling. Ugh. This is an easy fix though. Either use some corner molding for this part, or just use some white caulk and send it down the line and fill in the gaps between the ceiling and the slat.
The next ugly part? The corners. You may not have been able to paint all the way to edge and the gaps?... well that was half near impossible :) So, just cover that up with some corner molding!
and after :) See, nice and polished. Wouldn't ever think that ugly mess existed lol.
Here's one of the before pictures of my front room (I think about a year or so ago), with most amount of ....well, beige. I don't think the burlap curtains and lamp helped :)
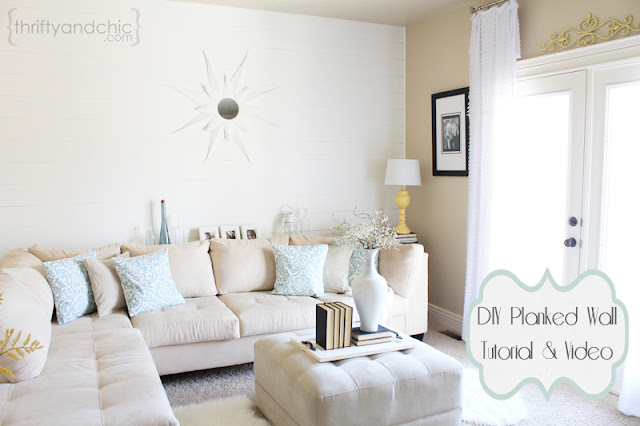
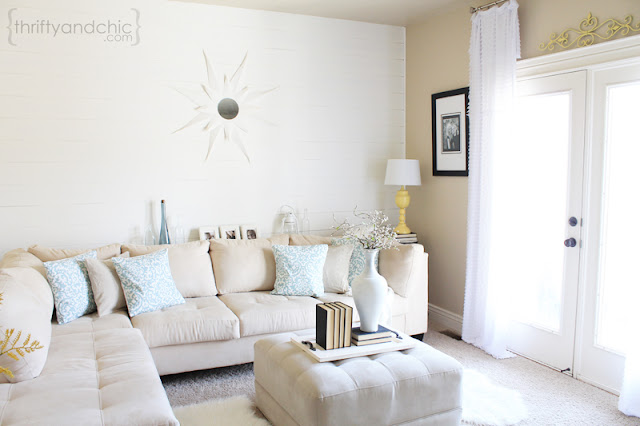
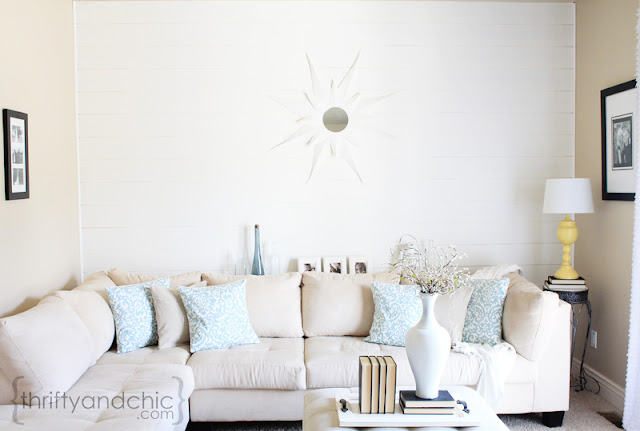
And now with the planked wall! This made such a difference. Beige beige beige be gone! Meet crisp linen white :) Figures all I needed was a nice white wall.
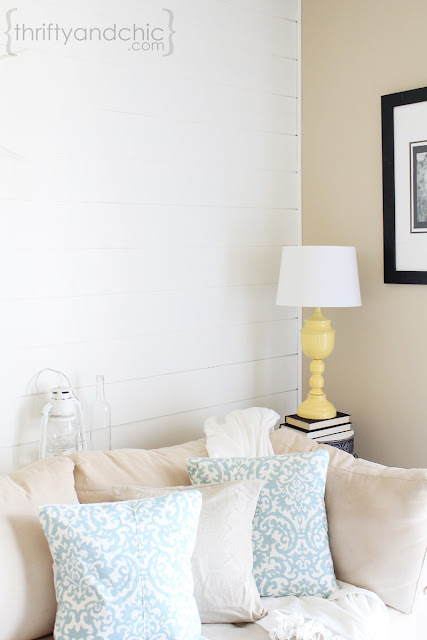
Of course, not just white, but planked and white. It has a lot of character. I hate to say it, because I think I say it a lot. I love this room now. Hopefully this time it will last longer than a week :) lol
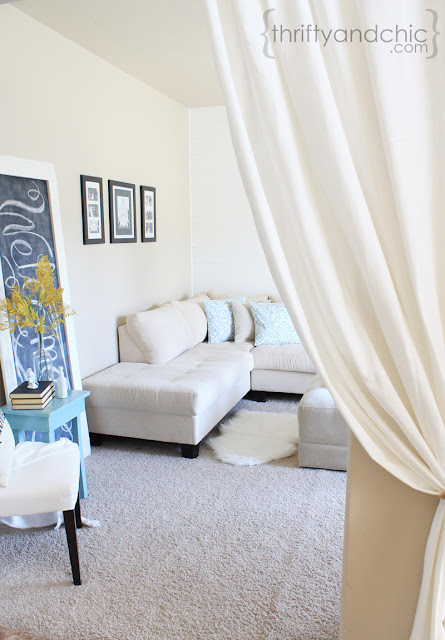
Here's a glimpse of it through the entry. It really makes the room look bigger...and so much brighter. I always thought this room got horrible sun, but really, it just needed a little pop of white to help.
This project could be done in one day or throughout a weekend. Especially if you have someone helping you. I did this whole thing by myself...floppy boards and everything...this is how most projects go throughout my house...I start, ask for help, get it for 1 second and then he realizes that he doesn't like change and putting holes in the wall. And then there goes my help lol. This is totally possible to do by yourself (obviously), but I would suggest getting some help to make it go quicker and to save your sanity :)
Here's a video that explains some items in a little more detail on how I put up the wall. If you watch and listen closely, we have a guest appearance by Max and guest voiceover by the sweet babe :) Enjoy!
To check out some other great projects and how to use 3M's wonderful products visit the 3M DIY Twitter Page and the 3M DIY Facebook Page.







 and the



Looks really nice! Thanks for the tutorial. Also, where did you get your sectional and pillows?..love the colors :-)
ReplyDeleteThanks Katie! I got the sectional at RC Willey and the pillows I made with fabric from Waverly.
DeleteWow!! Love this look! Amazing! Jenna @ Rain on a Tin Roof
ReplyDeleteWould this Masonite be sturdy enough to add to a ceiling? I love the look of plank ceilings, I'm thinking this would be easier.
ReplyDeleteIt should, although it may bow out a little bit if you don't secure it properly. So, if you are concerned, used liquid nails instead. Or just try it my way, and see if it works!
DeleteWhat a difference that made, it looks amazing! I would love to do that in one of my rooms, hopefully I will be able to...one day!;) I love your couch, it is gorgeous! Where did you get it? Is it hard to keep clean?
ReplyDeleteI think it would look great with that wooden star burst mirror that was on the tan wall. Something about that white mirror your using now just throws it off to me. The wall looks great! So happy you are happy with it.
ReplyDeleteI think the same thing, but that mirror is on my other white planked wall...I guess that just means I got another project on my hands :) But really, in person, the white mirror looks really good in here too
DeleteYou do the most amazing stuff!! It looks fabulous. I am loving your sectional and pillows too. I think that rooms looks so inviting. Great job.
ReplyDeleteCongratulations on a job well done. The after pictures look like something out of a decorating magazine. Also, kudos to you for having the guts to have white furniture and a big beautiful dog:)
ReplyDeleteMaude
Room looks fabulous. Can you give details about the couch?
ReplyDeleteGreat Job!
ReplyDeleteI have this same wall in my house, and I LOVE IT!! It turned out amazing!!
ReplyDeleteI would love for you to come join my paint party starting tonight at 8 pm MST!! Hope to see you there
Brooke
Startathome.blogspot.com
What an awesome wall! I love it & what a great idea for such a great price! I'm featuring it in this week's Power of Paint Party. Thanks for linking up.
ReplyDelete